Nexus Wallet Module Documentation
DEPRECATED! Nexus Wallet Module documentation has been moved to https://github.com/Nexusoft/NexusInterface/tree/master/docs/Modules
Project maintained by Nexusoft Hosted on GitHub Pages — Theme by mattgraham
How to install a Nexus Wallet Module
Prerequisites
In order to install a Nexus Wallet Module, first you need to have the Nexus Wallet installed and running on your computer. Download the latest version of Nexus Wallet if you haven’t.
Next, you need to get a copy of the module that you want to install. Currently Nexus hasn’t had a central place that hosts all the published modules (though we may have it in the future), so it’s up to the module developers how the modules are delivered to you. It’s also up the the module developers which format the modules are packaged in, but it’s very likely that they are in an archive format (.zip for example).
Install the module
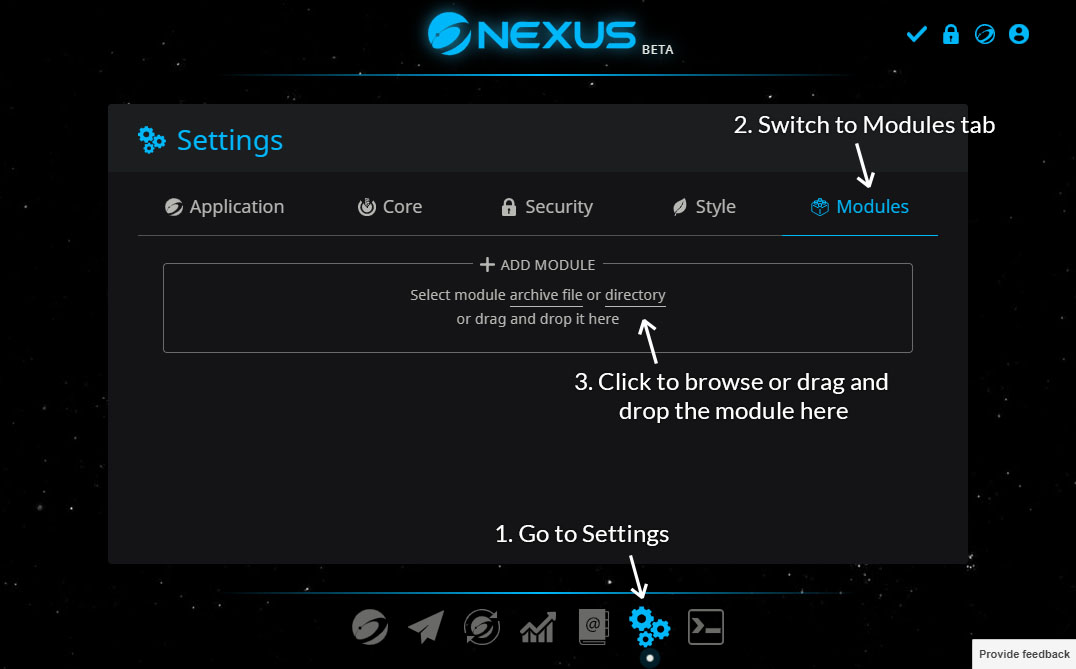
Once you already have a copy of the module that you want to install, open your Nexus Wallet, navigate to the Settings page (via the navigation bar at the bottom), switch to Modules tab, you’ll see an “Add module” section where you can either browse and select the module or drag and drop it there to install. If the module is in .zip or .tar.gz format then you can install from that file directly. If not, you need to extract the module to a directory and then install from that directory.
 How to install a Nexus Wallet Module
If the module is well-formed, a Module Details modal will pop up showing you the preview details about the module you’re going to install. After reviewing all the module details, carefully reading the warning at the modal’s bottom, and making sure you want to install the module, you can click “Install Module” to start installing it. A success message will pop up once the installation is done successfully.
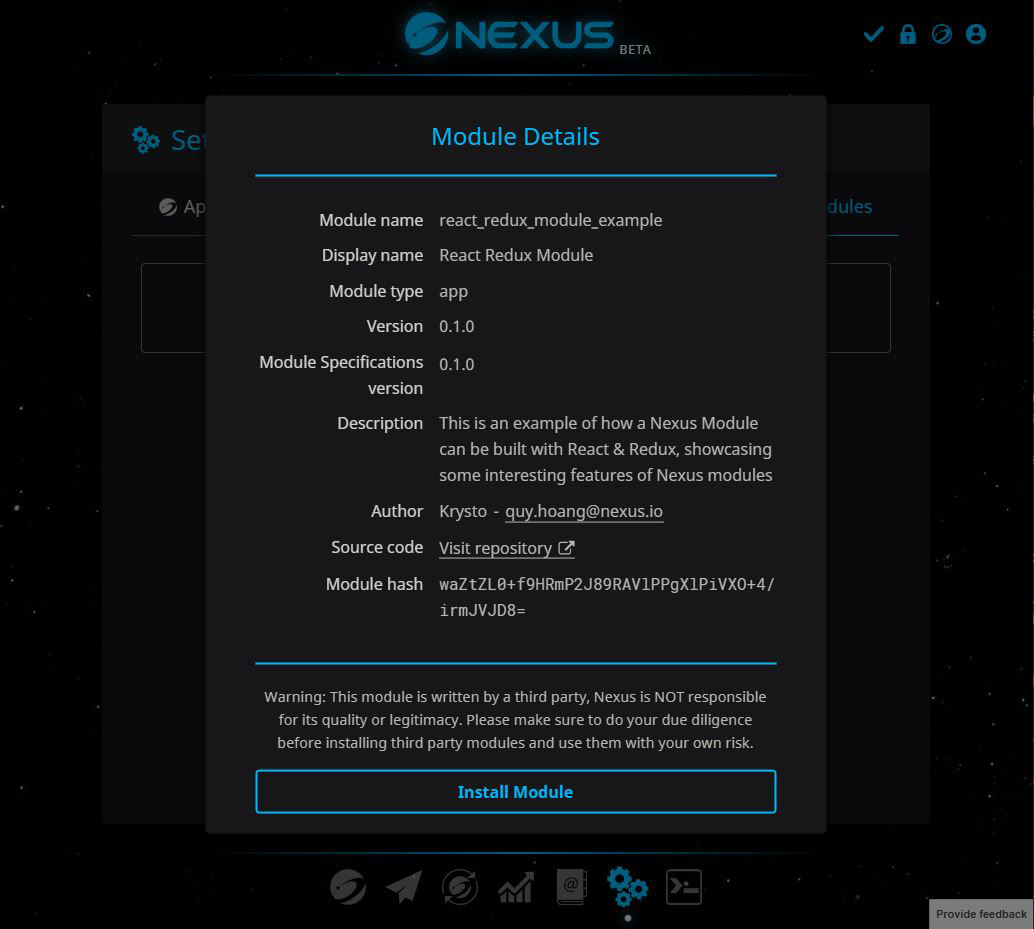 Module details preview for installation
Module’s validity
In some cases, the “Install Module” button will be disabled if the module is invalid. The reasons for which an module can be invalid include:
-
The module is built on an obsolete Module Specifications version that’s no longer supported by the wallet version that you’re running.
-
The module doesn’t have an open source repository, or the repository is no longer online, or the repository is not verified (by the Nexus team) to be the real source code of the module you’re going to install. This is one of the security constraints to prevent the possibility that attackers can put malicious code into their modules. Because all the modules are enforced to be open source, everyone (including the Nexus team) can inspect their source code and find out if it is malicious.
However, this constraint might be troublesome when you’re developing your own modules. You cannot push your code to the repository and get the verification signature everytime you make just a little change. In that case, you can go to Settings/Application, turn on “Developer Mode”, then turn off the “Module open source policy” option. You can now run your module for testing on your wallet. Please keep in mind that this settings is only for your own modules that you’re developing. If you turn this feature off and install a module not written by yourself without the open source verifications, you will be totally at your own risk and absolutely no one but you would take responsibilities for the consequences in case that the module turns out to be malicious.